Best Heavy Bowgun Builds for Monster Hunter Wilds 2026: Spread, Pierce & Sticky Meta Guide
Master the Heavy Bowgun in MH Wilds with our complete ranged build guide. Learn ammo types, Shield mod builds, Wyvernheart vs Wyvernsnipe, and the best HBG builds for every playstyle.
Written by the WildsBuilder team with extensive Heavy Bowgun testing across all endgame content. Last updated February 2026 based on Title Update 4 meta.
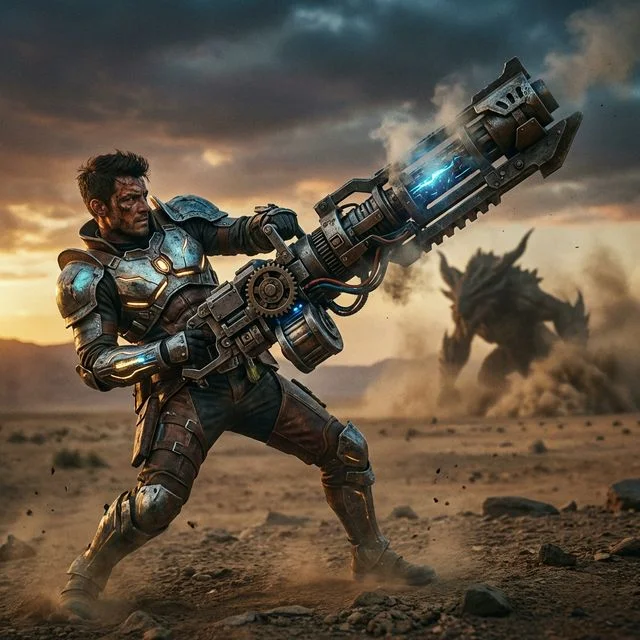
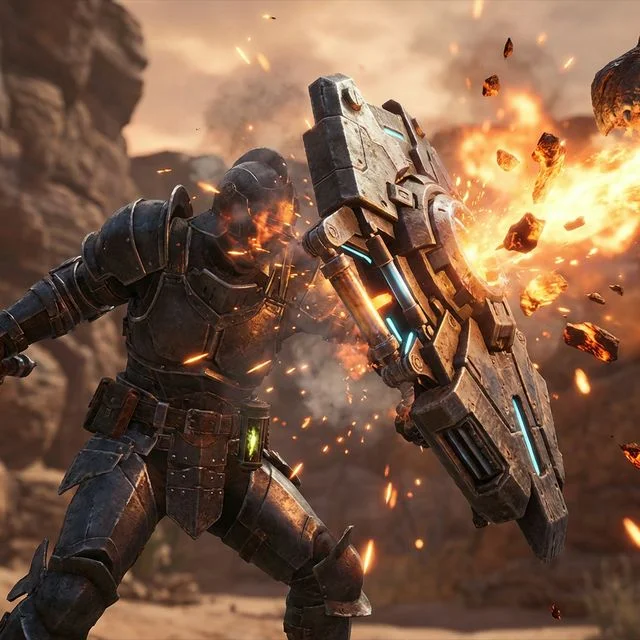
The Heavy Bowgun is Monster Hunter Wilds' premier siege weapon — a walking artillery platform that deals devastating damage from every range and can tank hits with a Shield mod when positioned correctly. While the Light Bowgun dances around the monster, HBG plants its feet and DELETES its target. This comprehensive MH Wilds Heavy Bowgun build guide covers everything from ammo type fundamentals to the best meta builds for speedrunning and casual hunts.
Our team has tested every HBG build extensively, including all three special ammo types, Shield vs. Evade mobility setups, and the complete ammo tier list for 2026.
What Makes the Heavy Bowgun Unique?
The Heavy Bowgun stands apart from other ranged weapons in two critical ways:
Understanding HBG Ammo Types
Ammo type selection is the single most important decision in any Monster Hunter Wilds HBG build. Each deals drastically different damage in radically different ways.
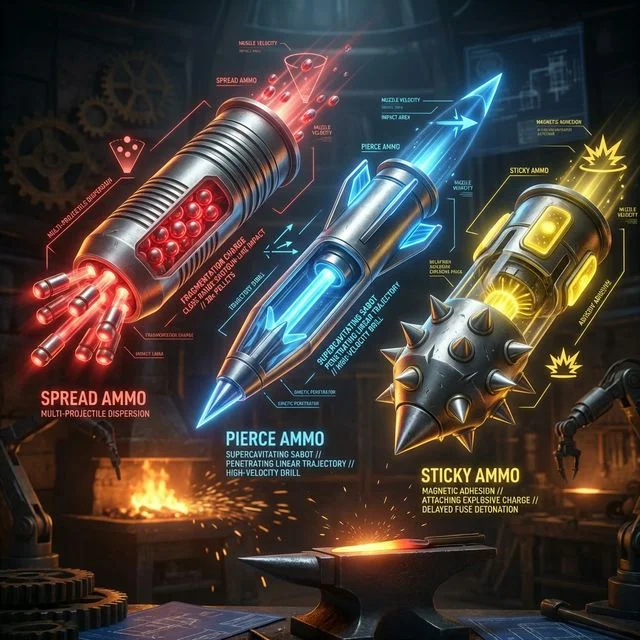
Spread Ammo — Maximum Close-Range DPS
Spread fires a cone of pellets, similar to a shotgun. All pellets must hit the same hitzone for maximum damage, requiring you to fight at near-melee range.
| Ammo Level | Pellets | Optimal Range | DPS Tier |
|---|---|---|---|
| Spread 1 | 5 | Very close | C |
| Spread 2 | 7 | Close | B |
| Spread 3 | 9 | Point blank | S |
Spread 3 is the meta DPS choice for any HBG that supports it well. At point-blank range, all 9 pellets hit the same weak point. Combined with a Shield mod for guard points, Spread HBG achieves the highest sustained DPS of any weapon in the game in our testing.
Critical distance: You want your barrel almost touching the monster. The closer you are, the more pellets connect to the same hitzone.
Pierce Ammo — Long-Range Damage Chains
Pierce rounds travel through monsters, hitting multiple times as they pass through the body. Effectiveness depends entirely on the monster's length and your positioning angle.
| Ammo Level | Piercing Ticks | Optimal Target | DPS Tier |
|---|---|---|---|
| Pierce 1 | 3 | Small monsters | D |
| Pierce 2 | 4 | Medium monsters | B |
| Pierce 3 | 6 | Large/long monsters | A |
Pierce 3 excels against large, long monsters like Diablos, Brachydios, and Elder Dragons. Position yourself at their flank and fire down their length to hit every tick on the same hitzone. Against small or compact monsters, Pierce underperforms significantly.
Sticky Ammo — KO Machine & Team Utility
Sticky deals fixed explosive damage and generates KO buildup on headshots. It ignores hitzones entirely but also ignores armor modifiers — it always deals its flat damage.
| Ammo Level | KO Power | Damage per Shot |
|---|---|---|
| Sticky 1 | 30 | Low |
| Sticky 2 | 50 | Medium |
| Sticky 3 | 80 | High |
Sticky 3 spam stuffs the monster's head with KO buildup, stunning it every 30-45 seconds. Each KO window represents 8-12 seconds of free team DPS — often worth more than the direct damage from other ammo types in multiplayer.
Note: Sticky damage is NOT boosted by Attack Boost or affinity. Offensive skills are wasted on Sticky builds. Instead, stack Artillery 5 for maximum Sticky damage.
Elemental Ammo — Exploiting Weaknesses
Flaming, Freeze, Thunder, Water, Dragon, and Poison ammo deal elemental damage. Unlike LBG, HBG cannot Rapid Fire elemental rounds — each shot is a single, powerful elemental hit.
Our testing shows elemental HBG consistently loses to Spread/Pierce/Sticky in terms of DPS in most scenarios. Reserve elemental shots for weaknesses with 3★ ratings when other ammo runs low.
HBG Mods: Building Your Platform
HBG mods transform how your gun handles. Selecting the right mods is as important as selecting the right ammo.
Tier 1 Mods (Take Always)
Shield Mod — *THE DEFENSIVE CORNERSTONE*
Recoil Suppressor — *FIRE RATE GODS*
Tier 2 Mods (Situational)
Close/Long Range Up — +10% damage within or outside effective range. Use Close Range for Spread, Long Range for Pierce.
Reload Assist — Reduces reload speed. Critical if your main ammo has "Very Slow" reload in gun stats.
Deviation Corrector — Eliminates shot deviation. Only needed if your gun has significant Left/Right deviation innately.
Wyvernheart Reload — Reduces Wyvernheart reload time. Only take if you're in a hunt where you'll fire Wyvernheart multiple times.
Recommended Mod Layouts
Spread Build (5 mod slots):
Pierce Build (5 mod slots):
Sticky KO Build (5 mod slots):
Special Ammo: Wyvernheart vs Wyvernsnipe
Every HBG has access to one of two special ammo types. This is a fixed property of the gun — you cannot change it.
Wyvernheart — Minigun Mode
Wyvernheart transforms your HBG into a rapid-fire minigun for 5-7 seconds. The stream of bullets deals massive total damage and generates enormous wound buildup.
Wyvernsnipe — Single Precision Shot
Wyvernsnipe fires one enormous round that travels through the monster, dealing multiple massive ticks of fixed damage based on the monster's size.
Our verdict: Wyvernheart wins for consistent hunts. Wyvernsnipe wins for burst-damage windows on large targets. For most content, Wyvernheart HBGs edge out in sustained DPS.
Essential Skills for HBG Builds
Tier 1: Mandatory Skills
Critical Eye 7 + Weakness Exploit 3 — *THE AFFINITY CORE*
Every HBG build needs 100% affinity on wounds. Spread and Pierce both hit frequently, making every shot a potential crit. Target: 100% affinity on wounded weak points.
Critical Boost 3 — *MULTIPLY THOSE CRITS*
Once you hit 100% affinity, every shot crits. Critical Boost 3 raises crit damage from 125% to 140%. At 100% affinity the math is simple: more crit damage = more total damage.
Ammo Up 3 — *LARGER CLIPS*
+1/2/3 shots per clip depending on ammo type. For Spread and Pierce, this is a significant quality-of-life and DPS improvement. Never skip Ammo Up on any HBG build.
Tier 2: Ammo-Specific Skills
Spread Up 3 (Spread builds only) — +15% Spread damage. Mandatory for any Spread HBG build. This is a massive 15% damage increase to your primary damage source.
Pierce Up 3 (Pierce builds only) — +15% Pierce damage. Same logic as Spread Up — always include when running Pierce 3 as your main ammo.
Artillery 5 (Sticky builds only) — Sticky damage scales with Artillery, NOT Attack Boost or affinity. Artillery 5 roughly doubles Sticky damage vs. no Artillery. Essential.
Recoil Down 3 — Supplement your Recoil Suppressor mods. Lower recoil means higher fire rate, which translates directly to more DPS for Spread and Pierce.
Tier 3: Strong Additions
Wound Exploit 3 — +25% damage to wounded parts. HBG can shoot wounds rapidly; this multiplicative bonus adds up fast.
Guard 3 (Shield builds) — Reduces chip damage and stamina drain when guarding. With Guard 3 + Shield V2 mod, you can guard virtually any monster attack with near-zero recoil.
Focus Boost 3+ — Every HBG shot fired in Focus Mode gets the damage multiplier. Easy uptime on a ranged weapon.
Agitator 3 — Free attack and affinity during monster enrage states. Monsters are enraged often in endgame content.
Meta HBG Builds (Title Update 4)
Build 1: Spread HBG — Absolute DPS King
Weapon: Nergigante HBG (best all-round Spread stats) or Brachydios HBG
| Slot | Armor | Skills |
|---|---|---|
| Head | Nergigante Helm α | Attack Boost 2, Agitator 1 |
| Chest | Brachydios Mail α | Spread Up 2, Ammo Up 1 |
| Arms | Brachydios Braces α | Spread Up 1, Ammo Up 1 |
| Waist | Diablos Coil α | Critical Eye 2, Ammo Up 1 |
| Legs | Odogaron Greaves α | Critical Eye 2, Weakness Exploit 1 |
Mods: 2x Recoil Suppressor, Shield V2, Close Range Up, Reload Assist
Key Skills: Spread Up 3, Ammo Up 3, Critical Eye 7 (with decos), Weakness Exploit 3, Critical Boost 3
Playstyle: Fight at point-blank range. Guard incoming attacks with Shield + Guard 3. Fire Spread 3 bursts into weak points. Use Wyvernheart when monster is downed or wounded.
Build 2: Sticky KO — Team MVP
Weapon: Any HBG with high Sticky 3 capacity and Artillery support
| Slot | Armor | Skills |
|---|---|---|
| Head | Bomber Helm α | Artillery 2, Bomb Boost 1 |
| Chest | Nergigante Mail α | Artillery 2, Peak Performance 1 |
| Arms | Diablos Braces α | Artillery 1, Stamina Surge 1 |
| Waist | Bomber Coil α | Bombardier 2 |
| Legs | Nergigante Greaves α | Artillery 2, Peak Performance 2 |
Mods: 3x Recoil Suppressor, Shield V2, Reload Assist
Key Skills: Artillery 5, Bombardier 3 (bonus for Wyvernheart), Peak Performance 3, Guard 3 (with decos)
Playstyle: Fire Sticky 3 at the head. Stun every 30-45 seconds. Call teammates to unload during KO windows. You're the crowd-control anchor of any squad.
Build 3: Pierce HBG — Long Monster Specialist
Weapon: Any HBG with Pierce 3 level 3 capacity
| Slot | Armor | Skills |
|---|---|---|
| Head | Rathalos Helm α | Weakness Exploit 2, Pierce Up 1 |
| Chest | Nergigante Mail α | Pierce Up 2, Agitator 1 |
| Arms | Nergigante Braces α | Pierce Up 1, Wound Exploit 2 |
| Waist | Rathalos Coil α | Weakness Exploit 1, Ammo Up 2 |
| Legs | Odogaron Greaves α | Critical Eye 2, Ammo Up 1 |
Mods: 2x Recoil Suppressor, Shield V2, Long Range Up, Deviation Corrector
Key Skills: Pierce Up 3, Ammo Up 3, Weakness Exploit 3, Wound Exploit 2, Critical Eye 7 (with decos), Critical Boost 3
Target monsters: Diablos, Brachydios, Kushala Daora, Nergigante, Rajang — any monster with a long body hitbox.
HBG Combat Fundamentals
Positioning for Spread (Critical)
Spread HBG positioning is counterintuitive — you want to be at melee range, essentially touching the monster's weak point. Follow these rules:
Pierce Positioning
Wyvernheart Optimization
Common HBG Mistakes to Avoid
Mistake 1: Fighting at wrong range
Spread at long range or Pierce at close range both deal dramatically less damage. Learn critical distances for each ammo type.
Mistake 2: Neglecting Guard with Shield
If you have a Shield mod, Get Guard 3. Without it, blocking large attacks still deals significant chip damage. Guard 3 + Shield V2 = nearly zero chip damage.
Mistake 3: Using Attack Boost on Sticky builds
Sticky damage scales with Artillery and Bombardier — NOT Attack Boost or affinity. Artillery 5 is worth 4x more than Attack Boost 7 for Sticky damage.
Mistake 4: Firing Wyvernheart from long range
Wyvernheart's bullets have significant gravity drop at range. Fire at close-medium range against the weak point for maximum hits.
Mistake 5: Ignoring ammo crafting
Always carry Sticky materials, Pale Bone, and crafting components. Running out of primary ammo mid-hunt is avoidable with proper management.
Conclusion
The Heavy Bowgun is Monster Hunter Wilds' ultimate power fantasy — a walking tank that brings overwhelming firepower to every encounter. Whether you prefer the raw DPS of close-range Spread, the precision of long-range Pierce, or the team utility of Sticky KO builds, HBG has the highest damage ceiling of any gunner weapon.
Master your ammo type, get comfortable with Shield guarding at melee range for Spread, and you'll be one of the most impactful hunters in any squad.
Ready to build your perfect HBG? Use our Build Planner to experiment with skills, mods, and ammo combinations. Find the setup that clicks for your playstyle. Happy hunting!
Ready to Build?
Put this knowledge into practice with our free Monster Hunter Wilds build planner.
Open Build Planner →WildsBuilder Team
Monster Hunter Experts
The WildsBuilder team consists of veteran Monster Hunter players with over 5,000+ combined hours across the series. We specialize in build optimization, damage calculation, and helping hunters master the game.